
Making First Impressions Count with Property Photos
TABLE OF CONTENTS (skip ahead)

by Homepie | Published Dec 23, 2020
We’ve all heard it before: It only takes a few seconds to form a first impression. We know this is true about about people, but what about property–especially when it comes to selling the greatest asset you own?
Real estate photos undoubtedly play the most important role in both generating interest and deterring prospective buyers. In this article, we’re going to share some practical tips to help you optimize your listing photography and avoid making mistakes that keep people scrolling.
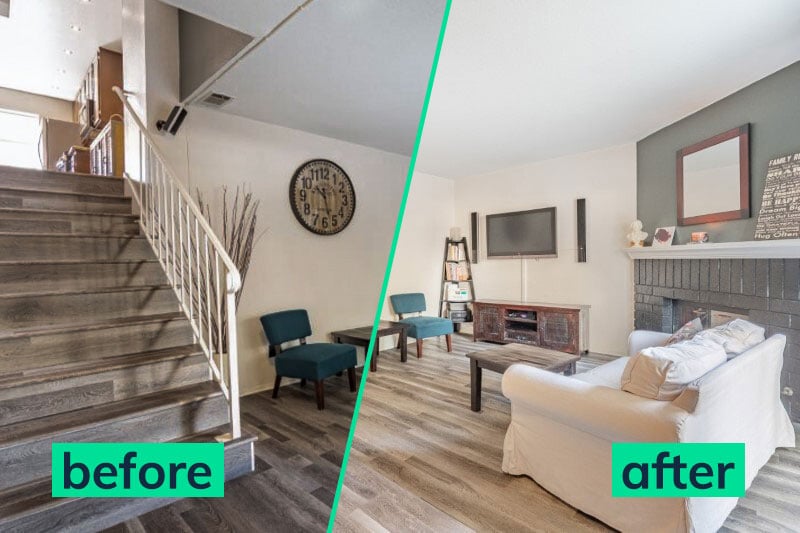
A Little Effort Goes a Long Way
Some homeowners half-heartedly list their homes just to see what happens. They put very little effort in and typically receive a similar level of interest. But if you are someone who is serious about selling your home – without the assistance of an agent – make the decision to invest some effort. That means before any lens cap comes off the camera, your home is ready to shine. Here’s a basic check list before you begin capturing photos of your home.
- Have your home professionally cleaned (and that includes the windows)
- Make necessary repairs and touch ups
- Declutter and remove personal items
- Display some new house plants
- Open curtains and turn on the lights
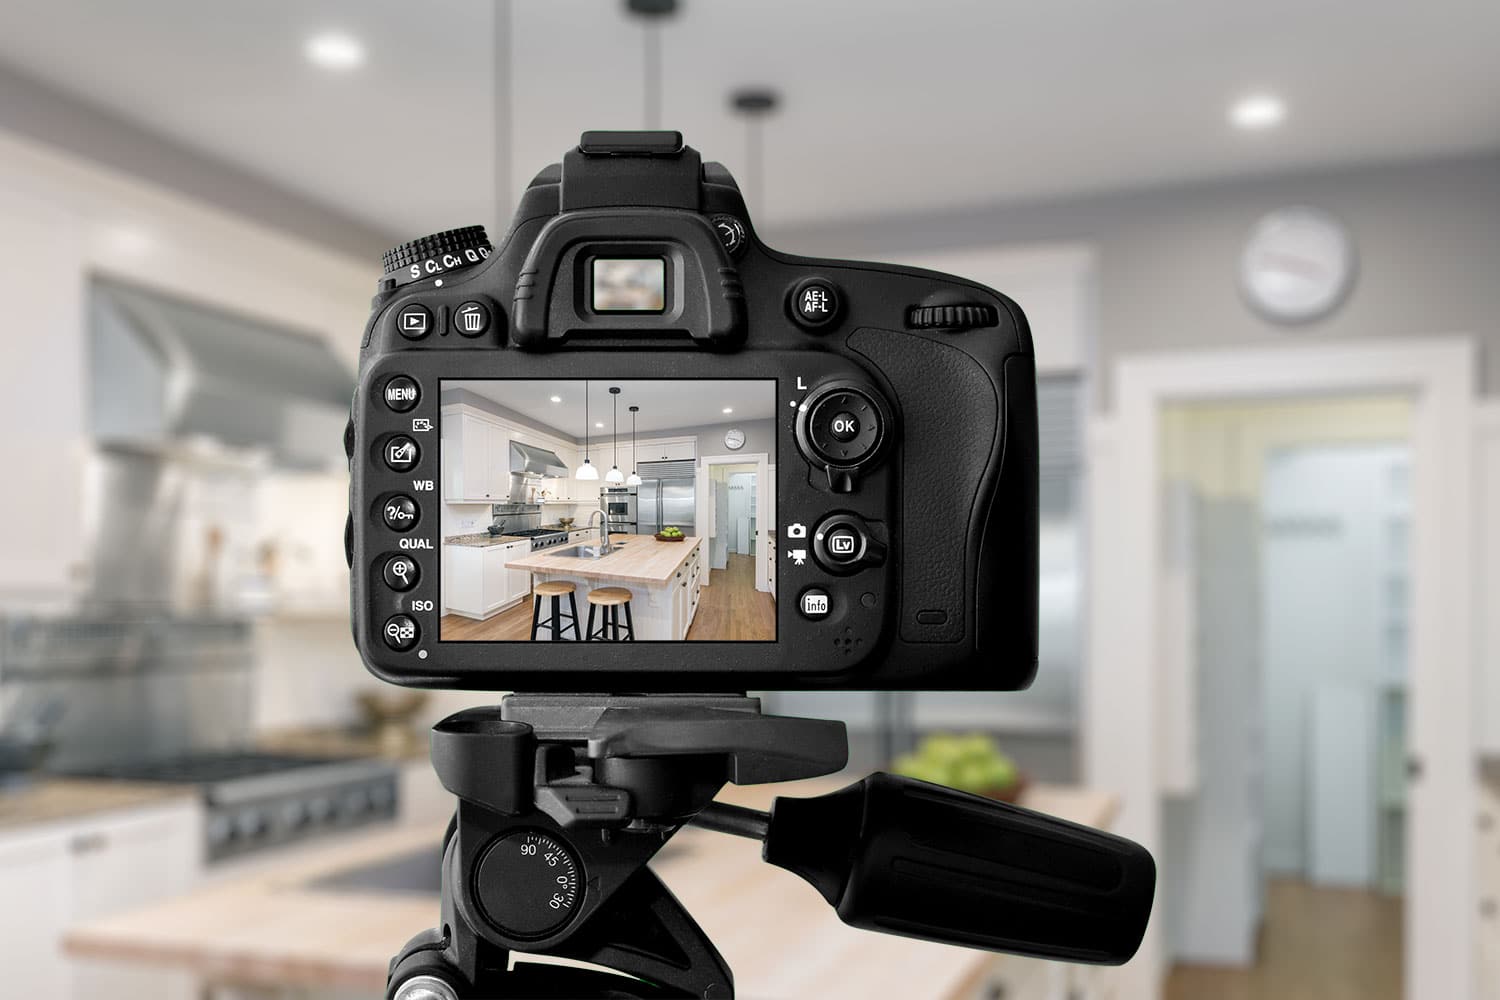
Hire a Real Estate Photographer
If you think you can skip hiring a professional photographer, you are setting yourself up for failure. They have the artistic eye and the right equipment – like wide-angle lenses, large sensor cameras, and portable lighting. In addition, they provide HDR and are able to stitch photos together with different exposures. That means you’ll have beautiful interior shots that still show the evergreen trees through the windows.
If you’re the type of DIY person, that’s great. But quickly snapping some shots with your smart phone isn’t going to suffice.
There are times when saving money makes sense, but this isn’t one of them. The good news is that hiring a professional real estate photographer is realtively inexpensive.
If you’re not willing to invest a mere $150-$200 in professional photos to showcase your largest investment – your home – you’re probably better off with an agent. But if you want to sell successfully on your own, you’ll need to invest in what matters.
Here’s why. Real estate listings with professional photos typically:
- Attract 6 times more buyer inquiries
- Sell 32% faster
- Sell for $3,000-$11,000 more
It’s worth every penny. If your home has decent curb appeal, you may want to consider some sunrise or sunset photos.
How Many Photos Do I Need for My Listing?
This depends on the size of the home. But don’t stress over it too much. Provide enough photos to your listing that will give people a good idea of your property. Someone interested will still want to schedule time to walk through it in person. According to research by Zillow, the sweet spot for most homes is 22-27 photos.
The Cover Photo is Critical
Now that you have your photos ready to upload, you’ll need to choose a cover photo for your listing.
Some sellers make the mistake of highlighting what they feel is impressive, when it actually hurts their listing. It’s best to think about are prospective buyers are looking for, not what features or recent fixes you think are important.
For example, let’s say you just installed led lighting for your front yard and you love the way they look at night. Should you make an exterior night photo the cover photo of your listing? That wouldn’t make sense. Yet people make these mistakes all the time.
We highly recommend selecting an exterior shot of the front of the house for your cover photo (ideally a daytime or sunset shot). But there are reasons why you may want to use an interior photo instead. If you live in a high-rise building or condo, for example, you might want to choose a photo of the living room or kitchen. Think about what will showcase your home best and make it look large and open. Confined spaces like galley kitchens are not recommended, however.
If for any reason you’re still unsure about what your cover photo should be, browse some recent home sales in your neighborhood and get some ideas from houses with similar layouts.
Order Your Photos
Now that you have your cover photo selected, it’s time to arrange them. Just displaying your home in a way that seems random or unorganized will leave a bad impression of your home.
After the cover photo, we recommend arranging your photos in a similar way that you would show it, starting with the entrance.
So for most homes, this order works best: Exterior front, front door entrance, living room, kitchen, then bedrooms and bathrooms. Unless your backyard could be featured in a home and gardens magazine, it’s probably best to just to save those photos for the end.
Do I Need to Show Toilets?
Close up shots of toilets are not always necessary. Toilets are fine to include, but you certainly don’t want to make them a focal point, let alone the cover photo (yes, we’ve actually seen it!). If it’s a nice remodeled bathroom, you may want to highlight it.
Step It Up with Video
Adding a short video tour of your home will set your property apart from others. That’s because hardly anyone takes advantage of video upload features. If your home is well-lit, you might be able to use your mobile phone, especially if you have one of the newer iPhones with wide-angle lenses. But if you don’t mind investing a little more money, we recommended asking your photographer for a quote. Since they’ll already be capturing photos of your home, you’ll probably be surprised how inexpensive adding a video tour to your quote can be.

Promote from One Place
The best way to market your home online is use the powerful tools available on Homepie.com. In a matter of minutes, you can easily create your listing by entering a basic description and upload photos and video. Then you can select the cover photo and arrange them in the right order. And if you choose the MLS option, Homepie will do all the work for you.
Homepie will take your property listing and share it to the MLS database and 100+ websites (like Zillow and Redfin) to gain the exposure you need to sell your home.
Managing your home sale from one place will save you time and stress. And to make it even easier, you can choose to receive a quote from a local real estate photographer when you begin the listing process. By investing a little time and effort, and using the right tools, you’ll soon be on your way to receiving offers and handing over the keys.